
How To Build A Poured-In Stem Wall
Building a solid foundation is the first step toward any long-lasting structure, and a poured-in-place concrete stem wall offers both strength and stability for a wide range of building types. Commonly used in residential construction, stem walls serve as a critical transition between the foundation footing and the vertical walls of a building, elevating the structure above ground level to protect it from moisture, pests, and shifting soil.
In this article, we’ll walk you through the basics of constructing a poured-in stem wall—from initial site preparation and forming techniques to pouring, leveling, and curing the concrete. Along the way, we’ll cover materials, and tips to help ensure accuracy. Whether you're a seasoned builder looking for a quick refresher or a hands-on homeowner tackling a foundation project for the first time, this guide can help you lay the groundwork for a successful build.
Step 1: Marking THe Width
Starting with a standard concrete footing as the foundation, we begin by carefully marking out reference lines to establish the precise width of the wall to be constructed. In this instance, the wall is designed to be 8 inches thick. Accurate measurement and layout at this stage are essential to ensure the structural integrity and alignment of the finished wall. These guide lines will serve as a critical reference throughout the construction process, helping to maintain consistency and adherence to the project specifications.

Step 2: Setting up The Form
Next, position your wooden form boards along the previously marked layout lines, aligning them precisely along one side to create one continuous edge. These boards will act as the framework for shaping the concrete and must be installed in a single, level layer to ensure accuracy. Once all boards are in place and properly aligned, secure them firmly to the concrete footing using long vertical wooden stakes. There are many ways to secure the boards, and when you do, ensure the boards provide strong support to the structure, ensuring the formwork remains stable and resistant to any movement during the concrete pour.

Step 3: Add Second Layer
Once the initial layer of form boards has been securely fastened to the vertical wooden stakes, proceed to install a second layer directly atop the first. Its important to offset the joints of the upper boards relative to those below to enhance structural stability and reduce the risk of weak points along the form. Carefully align each board and ensure it fits snugly atop the lower layer. As you build upward, continue to check for level and alignment, and reinforce the assembly as needed to maintain rigidity and prevent shifting during the concrete pour.

Step 4: Additional Rebar
At this stage, it's the perfect time to begin tying in the rebar reinforcement, which is essential for the structural strength of the wall. Position horizontal rebar and securely tie it to the vertical bars previously embedded in the concrete footing using steel tie wire. This forms a shape similar to a 'pull-up bar,' creating a strong, interconnected framework that will maintain the structural integrity of the wall once it’s poured.

Step 5: Beginning The 2nd Half
Once the first half of the formwork has been assembled and secured, the next step is to install the opposing side. Carefully align the form boards on the opposite end to mirror the position and height of the first, ensuring consistent wall thickness throughout. Once properly aligned, secure the boards using additional vertical wooden stakes, following the same method used for the first side. Accurate alignment and firm anchoring on both sides are critical to maintaining the form's shape and preventing any movement during the concrete pour.

Step 6: Completing The Form
As in Step 3, begin by placing form boards along the unfinished side of the wall layout. These boards should be positioned carefully to mirror the opposite side, creating a consistent and parallel structure. Secure them in place using additional vertical wooden stakes, offset from those used previously to avoid interference. When properly installed, the form boards on both sides create a channel that neatly contains the rebar reinforcement in the center. This setup ensures the rebar remains properly positioned during the concrete pour, contributing to the overall strength and alignment of the finished wall.

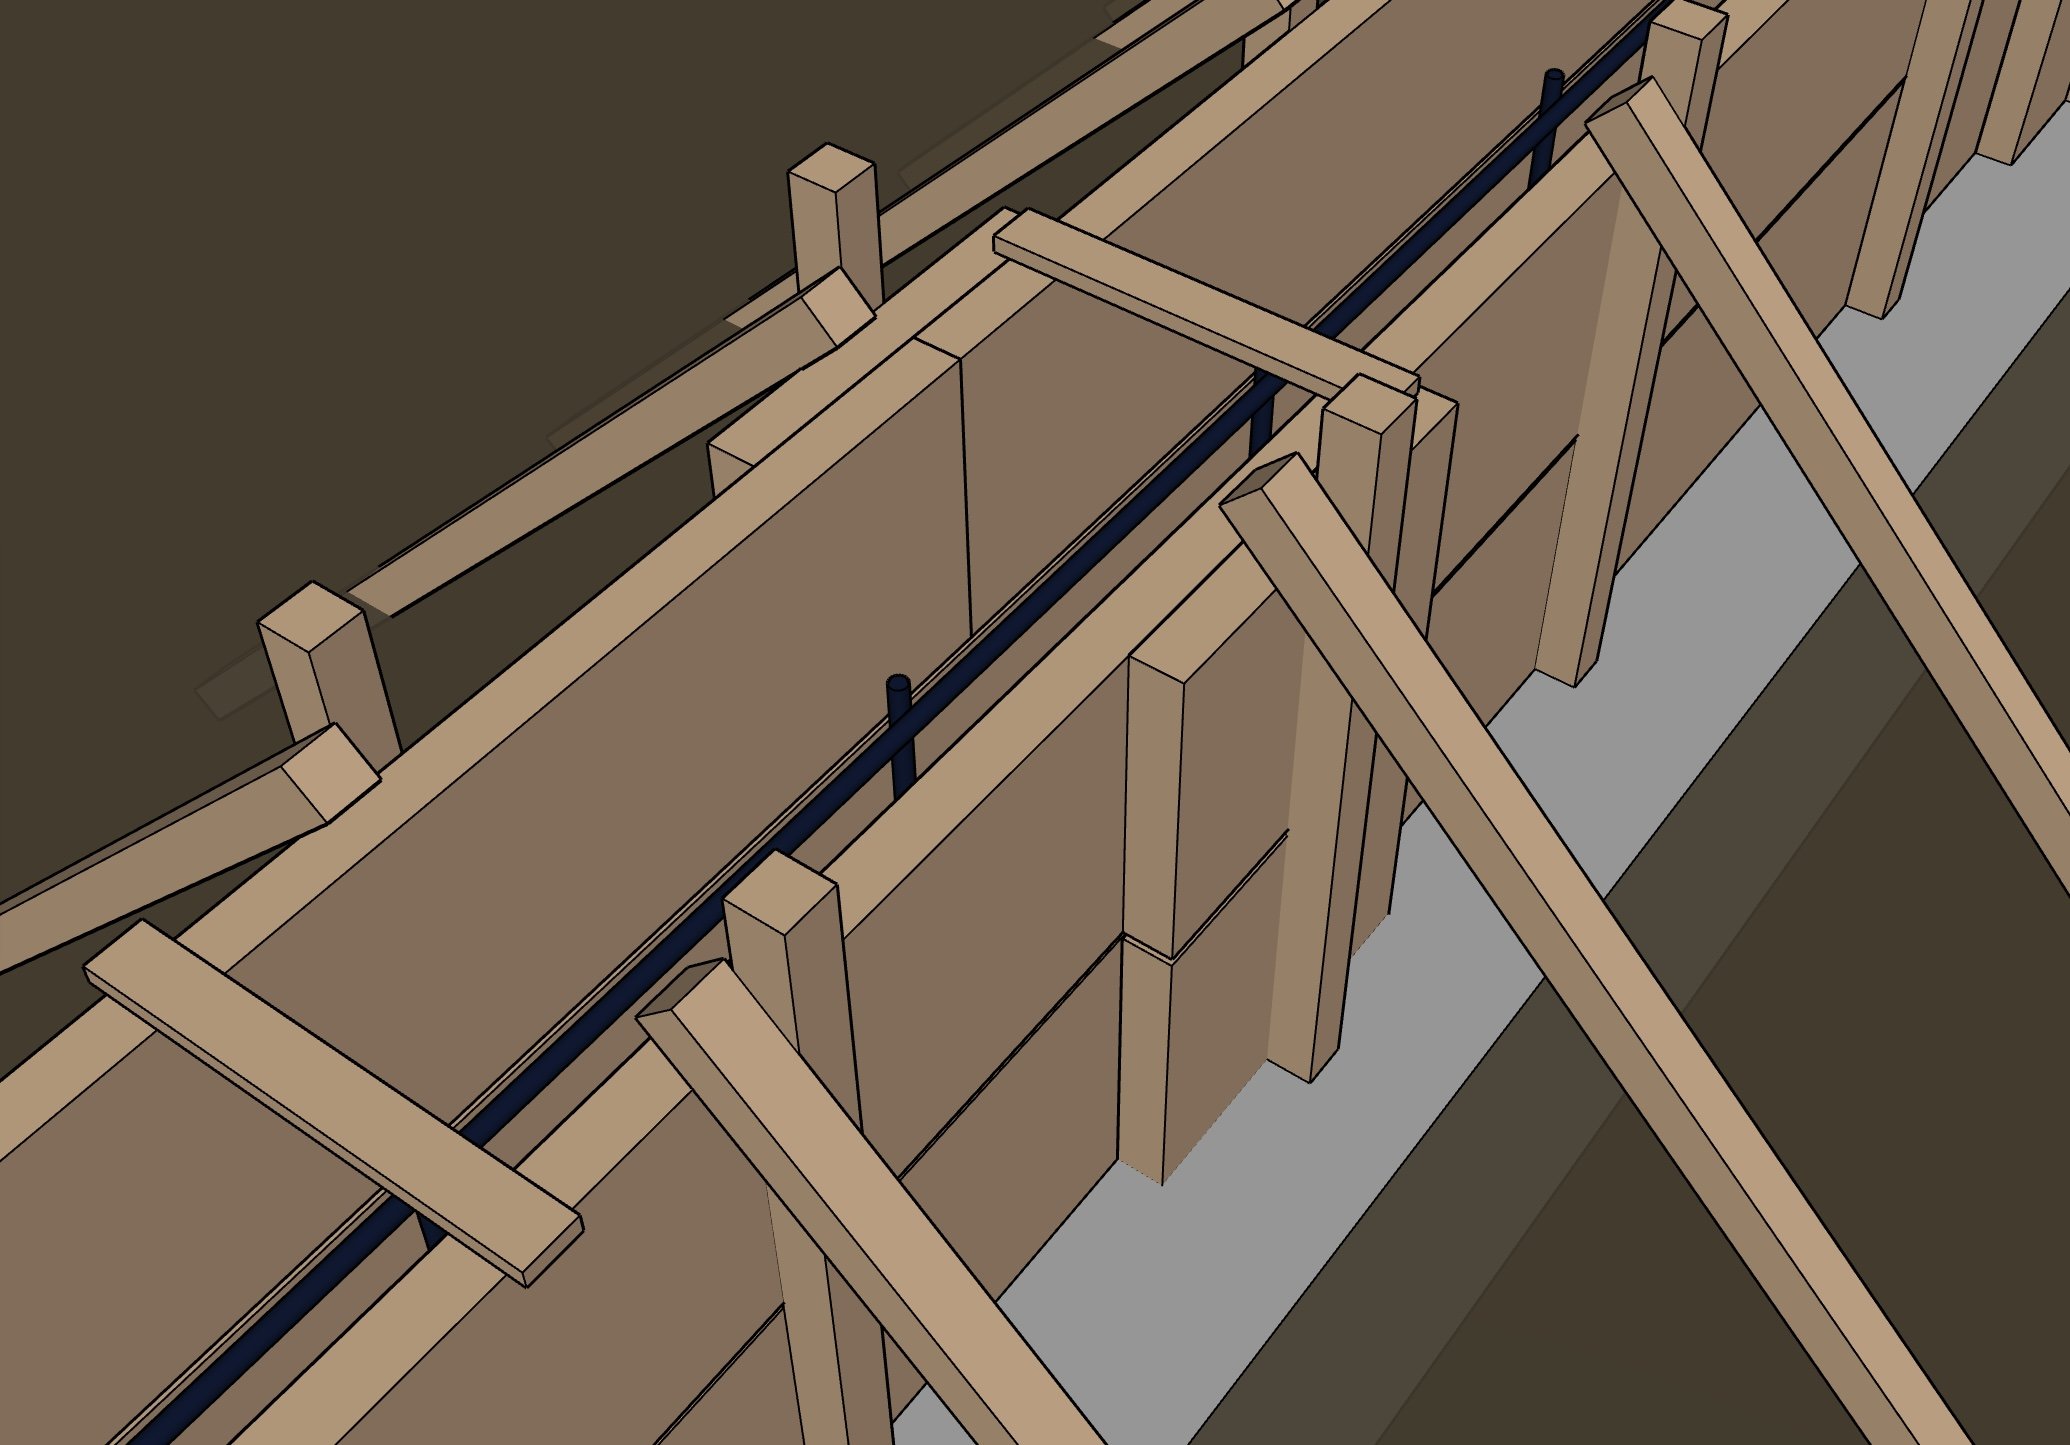
Step 7: Securing WIth Spacers
To further reinforce the formwork and maintain alignment, attach wooden spacers across the top edges of the form boards. These spacers should be installed at regular intervals, ensuring even distribution to effectively brace the form sides against outward pressure. In addition to holding the boards firmly in place, the spacers help preserve the intended wall dimensions and prevent the top of the form from spreading or splitting under the weight of the poured concrete. This added structural support is essential for maintaining accuracy and avoiding any deformation during the curing process.

Pro Tip! : Additional Reinforcement
To reinforce the joints where two form boards meet, attach a spare piece of wood along the back side of the form. This added support strengthens the seams and helps maintain the integrity and alignment of the formwork under pressure. These reinforced sections also serve as ideal anchor points for securing your wooden spacers, ensuring both sides of the form remain properly braced and evenly spaced.
Finishing Up
With the formwork fully assembled and reinforced, you’re nearly at the finish line. The final step is to carefully pour the concrete into the form, ensuring it fills evenly around the rebar framework. Once filled, use a screed or trowel to smooth the surface to the desired level. If the formwork has held correctly and the concrete has set properly, your stem wall is finally complete! Congratulations!

! One Thing Before YOu Begin !
We hope this DIY guide helps you tackle your next project with confidence. However, it is very important to know where DIY ends and when it's best to bring in a professional.
Please, do keep in mind:
Specialized Equipment Could Be Impractical: Many advanced concrete techniques require professional-grade tools and machinery that are quite expensive to rent, even more expensive to buy, and frankly difficult to operate without the proper training. Attempting any advanced construction without the right equipment could lead to subpar results or some costly mistakes.
Safety Always Comes First: More advanced concrete work can involve heavy materials, chemicals, and high-risk tools. Our team is trained to follow strict safety protocols for this exact reason. Without proper experience, attempting techniques like these for your projects can put both your health and property at a serious risk.
Some Work Is Best Left To Professionals: Complex pours, structural elements, and specialty finishes often require techniques, knowledge and experience. A professional ensures that the job is done safely, up to code, and it's built to last.
If your project involves anything beyond the basics, we strongly recommend consulting with our team via the link below. You’ll save time, avoid costly mistakes, and get results that you can truly rely on!
Want to go beyond the basics?
While this guide provides a solid foundation for tackling a standard stem wall project, we understand that every build is unique—and sometimes, more complex needs call for experienced support. Whether you're working with challenging site conditions, integrating your stem wall into a larger structural system, or simply looking for a more customized approach, our team is here to help.
With years of hands-on experience and a commitment to quality craftsmanship, we offer professional services tailored to your project’s specific requirements. From detailed planning and code compliance to precision execution, we bring the tools, knowledge, and expertise to ensure your project is built to last.
If you’re ready to move forward—or maybe want to explore your options—don’t hesitate to get in touch. We’d be happy to discuss how we can help bring your vision to life.